What is PlanetIdle?
PlanetIdle is a planet clicker — a free idle game you play right in a browser tab, with no download and no sign-up. You start with a dead rock in the dark and a single button: Channel Stardust. Tap it and the world begins to wake. Spend the Stardust you draw on cosmic structures — condensers, meteor collectors, ocean seeders, lunar mines — that keep producing on their own, second after second, even while the tab is closed. The planet itself is your progress bar: it visibly changes from cracked lava to blue oceans to city-light as your numbers climb.
Never touched an idle game before? Here is the whole loop in one breath. You make a little Stardust by hand, buy a thing that makes Stardust for you, use that to buy more things, and the curve bends upward until a barren core has become a living, star-faring world. Two ideas set PlanetIdle apart from the endless clickers you may have seen. First, it has an ending: each chapter is a designed story with a real finish line, not an infinite grind for its own sake. Second, every purchase is part of the world — a building is an actual structure on an actual planet, and the art responds as you grow. If you want the worldbuilding, the science, and the reasons we chose to give an idle game a genuine ending, read the about page. This guide is the practical walkthrough: what to press, in what order, and why.
Your first five minutes
When the game opens you will see a single planet and a big label reading CHANNEL STARDUST. For the first thirty seconds that button is your only tool, so use it.
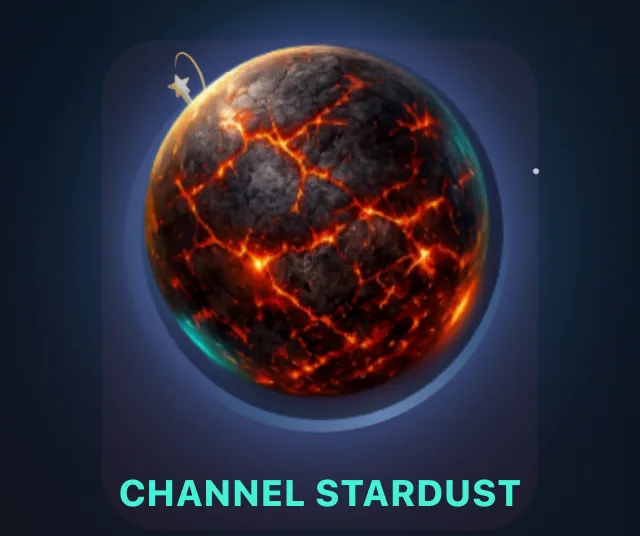
Every tap adds a little Stardust — you will see your click power on screen, something like +24 per click — and the counter at the top ticks up. (On a laptop you can press Space or Enter to channel instead, which is kinder on your mouse hand.) Keep going until you can afford your first building, then buy it immediately. Open the Buildings list — on a wide screen it sits on the right; on a phone it hides behind a Buildings / Upgrades toggle — and grab the cheapest structure available.
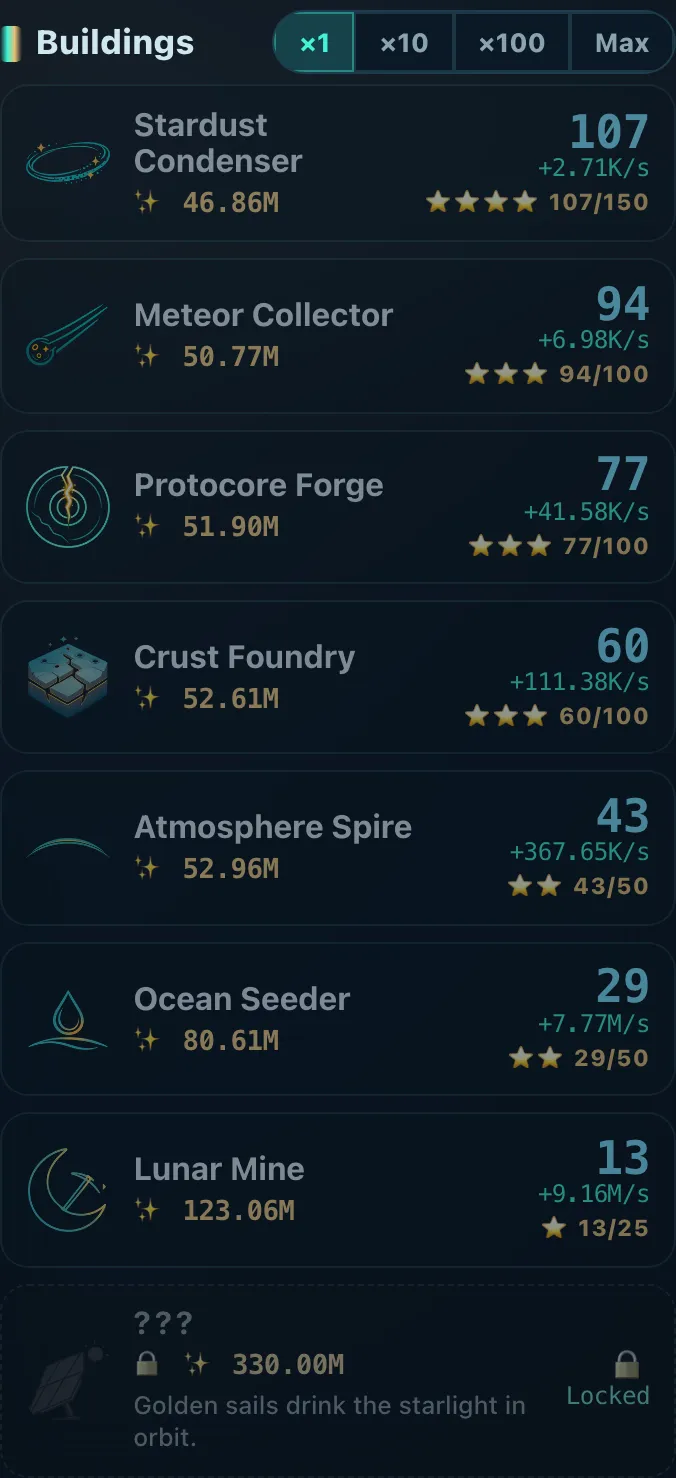
That first Stardust Condenser is the turning point: it produces Stardust every second whether or not you are tapping. Now the single most important habit in the whole game kicks in — spend, don't hoard. Stardust sitting in your bank earns nothing; Stardust spent on a structure earns forever. For these early minutes, whenever you can afford the next building or upgrade, buy it. Do that on a loop and you will be self-sustaining within minutes, watching the per-second number do the work your thumb used to.
Reading the screen
Once things are rolling, the layout is worth a proper look. On a wide screen PlanetIdle is three columns.
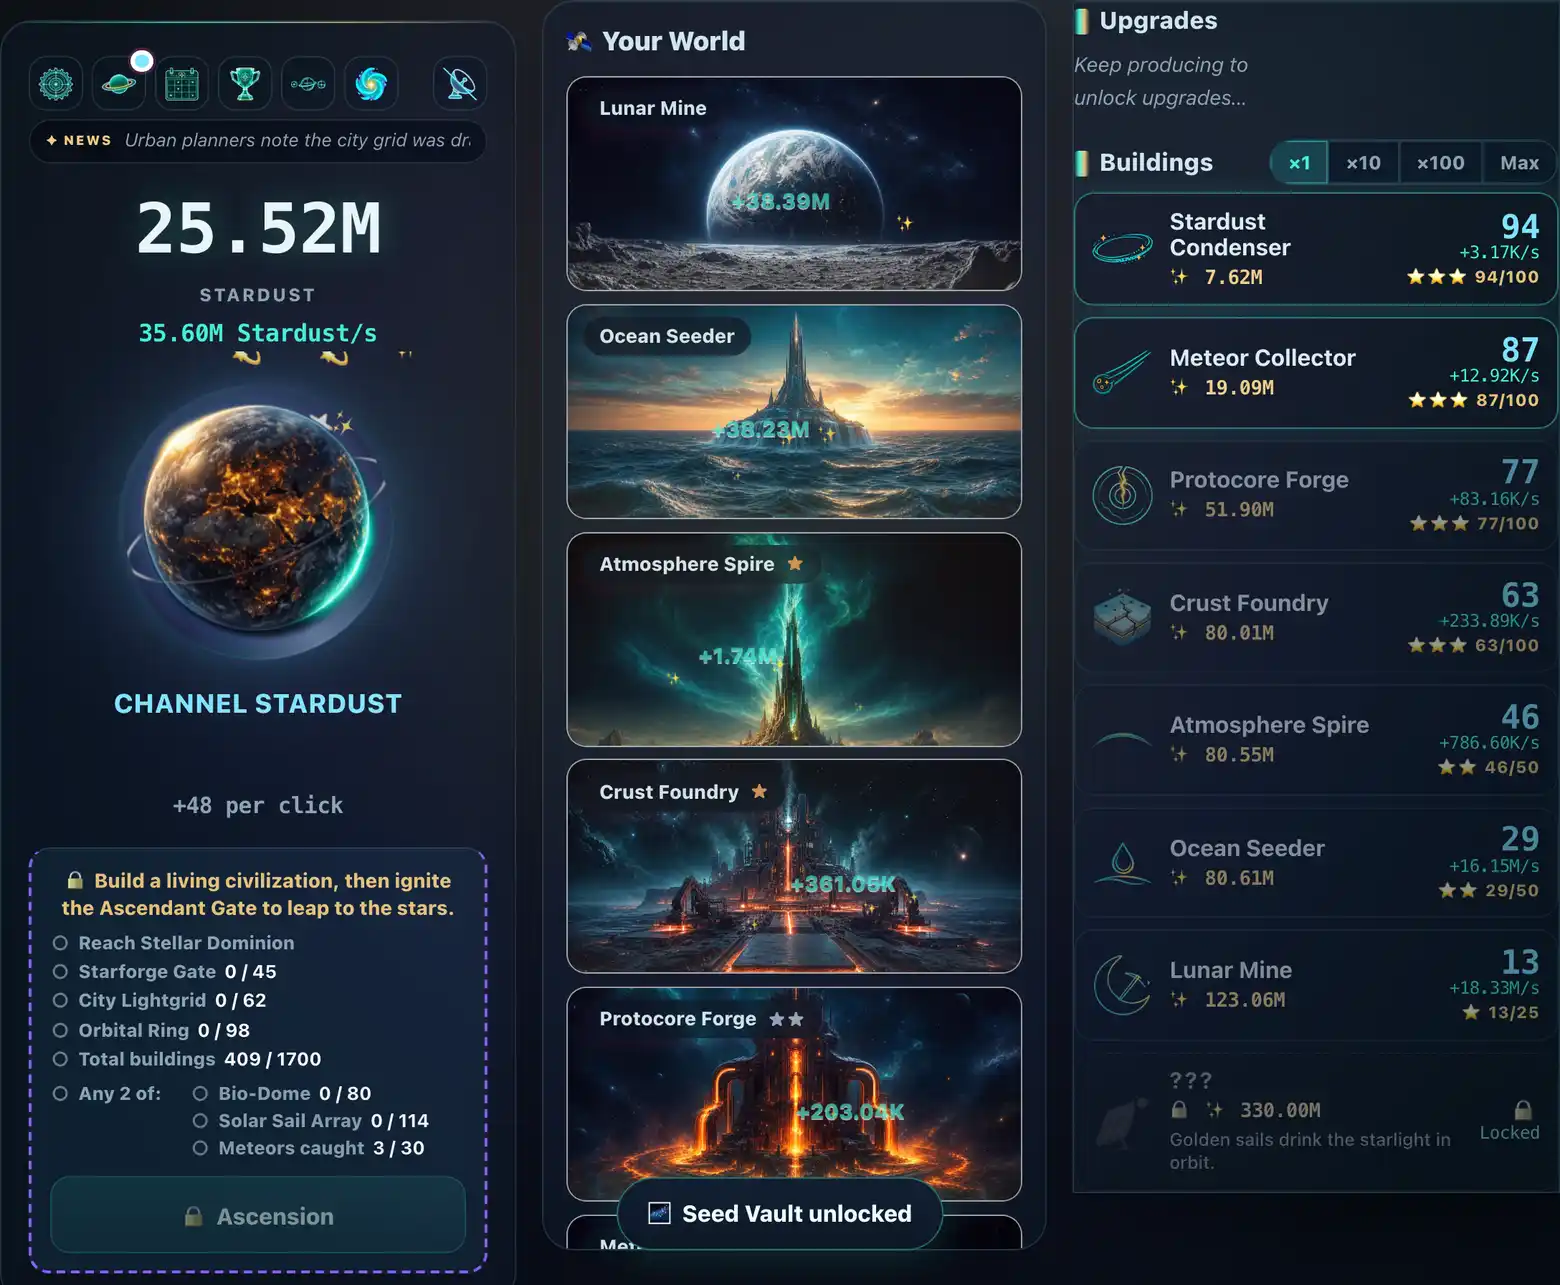
The left column is your planet and its vitals: total Stardust, Stardust per second, your click power, and the big channel button. Below it sits the Ascension panel — your long-term checklist for finishing the chapter, which we will come back to. The middle column, “Your World”, stacks a scene card for every building you own, each a painted vista with its current output floating over it, so you can see at a glance which structures are actually carrying your economy. The right column is where you spend: an Upgrades shelf up top and the Buildings list below, with ×1 / ×10 / ×100 / Max buttons to choose how many you buy at once.
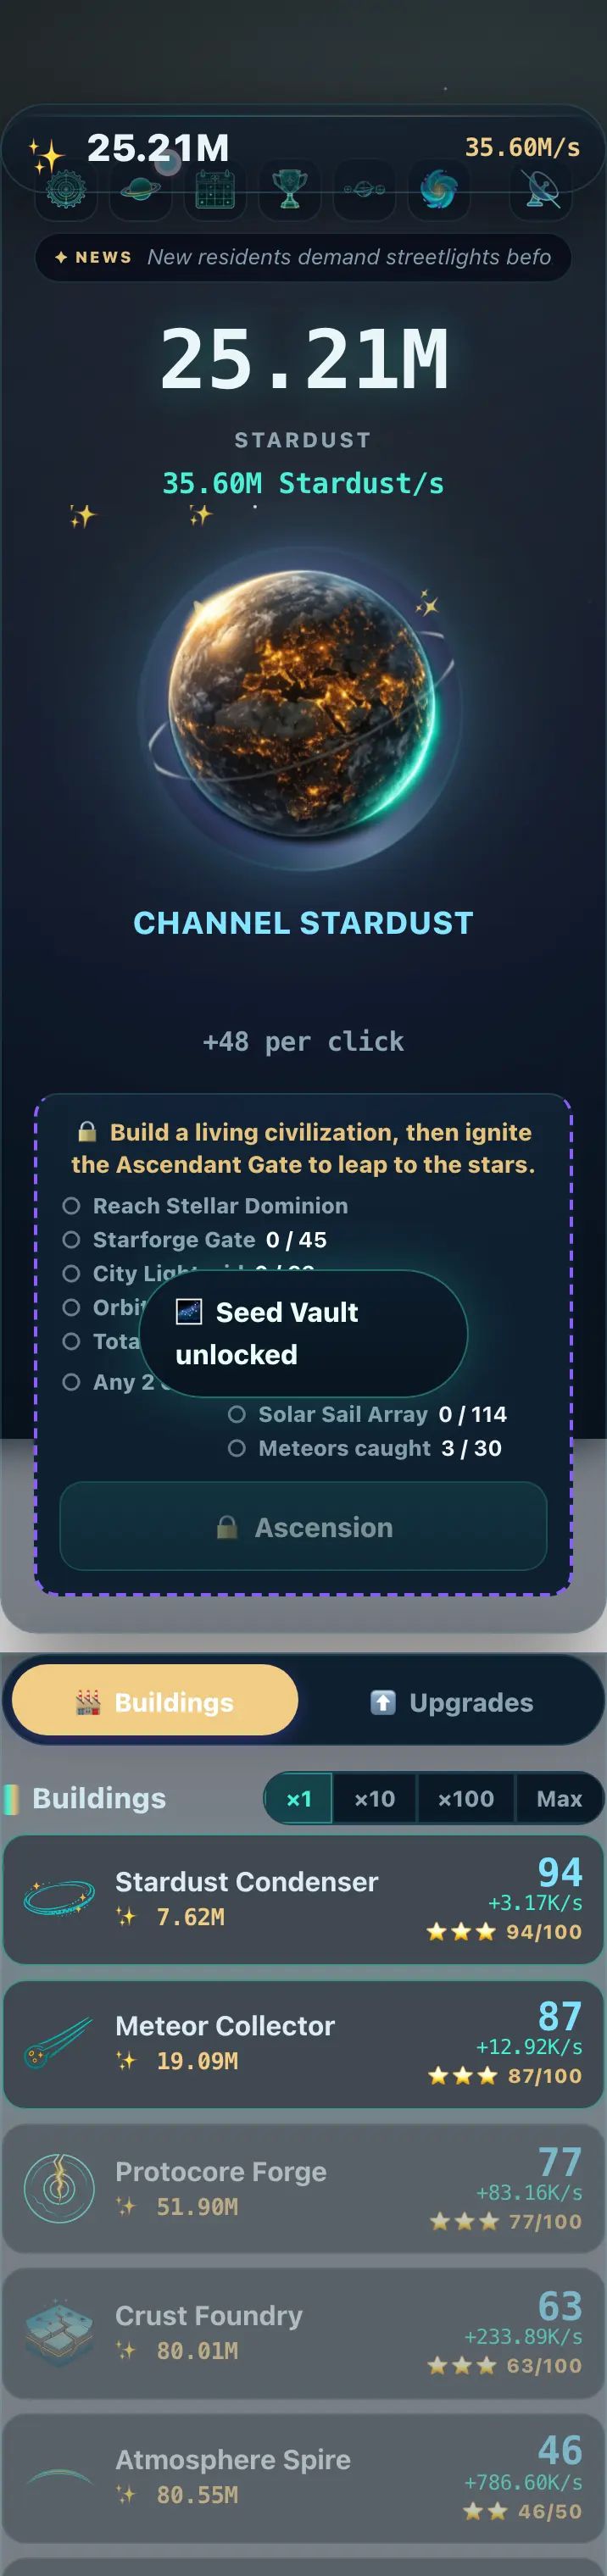
On a phone the same pieces fold into one scrolling column, with a slim sticky header that keeps your Stardust total and per-second rate in view, and a Buildings / Upgrades toggle to flip between the two shelves.
Buildings and buy strategy
Buildings are the engine of everything. Each one has a cost that rises a little every time you buy another copy, and a fixed Stardust-per-second output. The list runs roughly from cheapest to grandest — a Stardust Condenser costs a handful; a Lunar Mine costs millions but pays out millions. Because prices scale as you stack copies, the “best” building to buy is a moving target: early on the cheap ones dominate, and as you get richer the expensive ones start to out-earn a whole row of small ones.
You do not need a spreadsheet. A reliable rule for the entire early and mid game: buy the cheapest thing you can afford, and keep buying. Once you have real income, switch the buy buttons to ×10 or ×100 so you are not clicking the same row forty times — the game charges the correct escalating total and jumps you forward instantly. And watch the little “+X/s” under each building's name: if one structure is quietly out-producing the rest, it is usually worth pouring copies into it.
Upgrades and synergies
Buildings are the engine; upgrades are the tuning. An upgrade is a one-time purchase that multiplies something permanently, and it is almost always a better deal than one more copy of an expensive structure.
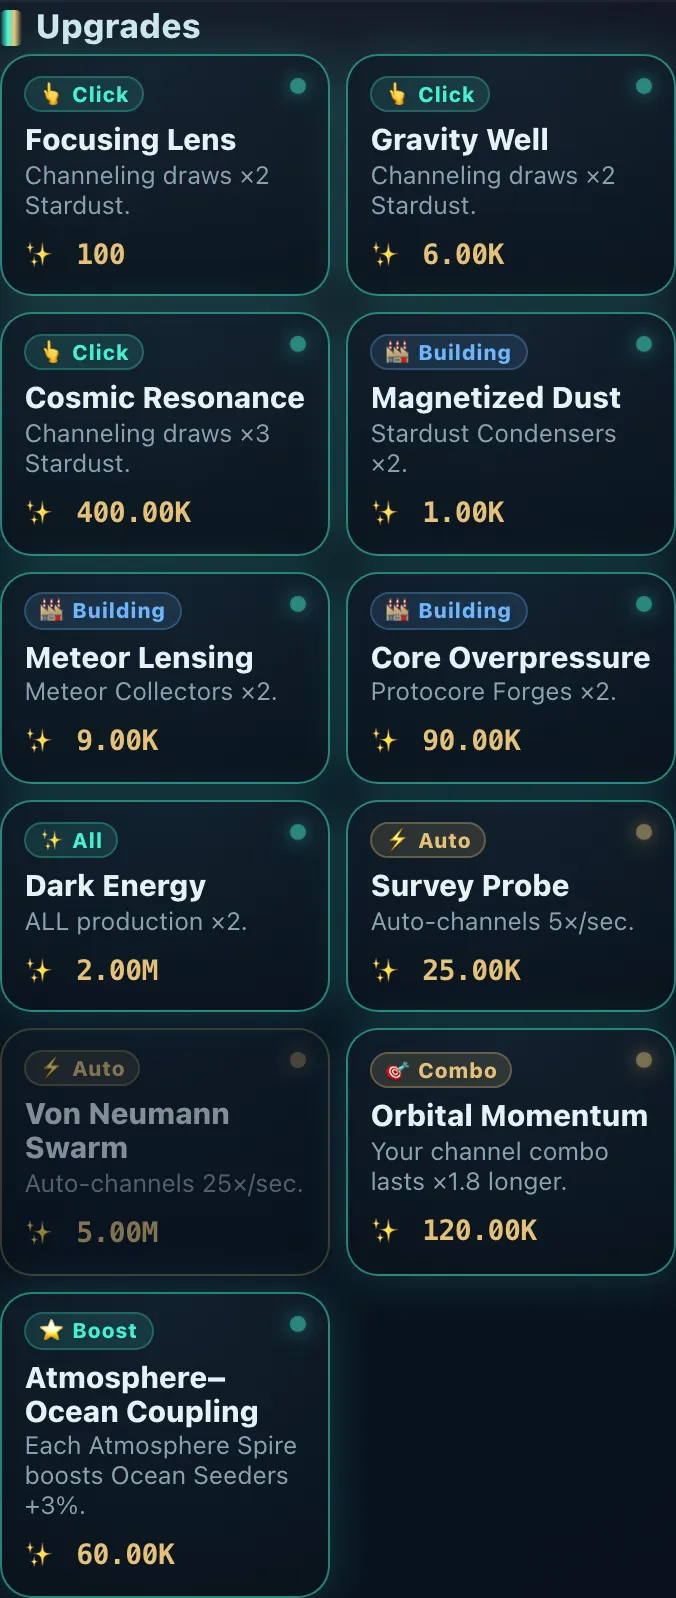
Upgrades come tagged by what they touch. Click upgrades (Focusing Lens, Gravity Well) multiply the Stardust you draw by hand. Building upgrades double a specific structure's output. All upgrades — like Dark Energy, “ALL production ×2” — multiply everything at once and are worth grabbing the instant you can afford them. Auto upgrades buy you hands-free channeling. Combo upgrades stretch your click combo. And the interesting ones are the Boost upgrades: synergies.
A synergy makes one building stronger for every copy you own of another. The classic example is Atmosphere–Ocean Coupling: each Atmosphere Spire you own boosts your Ocean Seeders by +3%. Own that synergy and stacking the source building suddenly pays a double dividend — the Spires earn on their own and quietly supercharge your Seeders. Whenever you buy a synergy, lean hard into the building it rewards.
Milestone stars (★)
Look closely at any building row and you will see stars and a fraction like “107 / 150”.
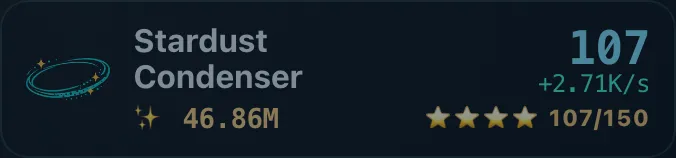
Those are milestones. Every building hits reward tiers as you stack copies — on Earth at 10, 25, 50, 100, 150 and 200 owned — and each tier permanently multiplies that building's output: about ×1.5 at the early tiers, climbing toward ×2.5 near the top, and your workhorse building even lands a ×3 at 200. The stars show how many tiers you have cleared; the fraction shows how close the next one is.
This changes how you buy. If a cheap building sits at, say, 47 copies, pushing it to 50 with a quick ×10 buy trips a milestone that boosts all fifty at once — often a bigger and cheaper power spike than anything else on the board. Chasing the next star is one of the most satisfying moves in the game precisely because the payoff lands immediately, across the whole stack.
Comets and the Supernova
Every minute or two a comet streaks across your sky for about thirteen seconds. Always tap it.

A comet pays one of two rewards at random. A Windfall drops an instant lump of Stardust, scaled to your bank and income — nice, but ordinary. A Supernova is the big one: ×7 to all production for fifteen seconds.
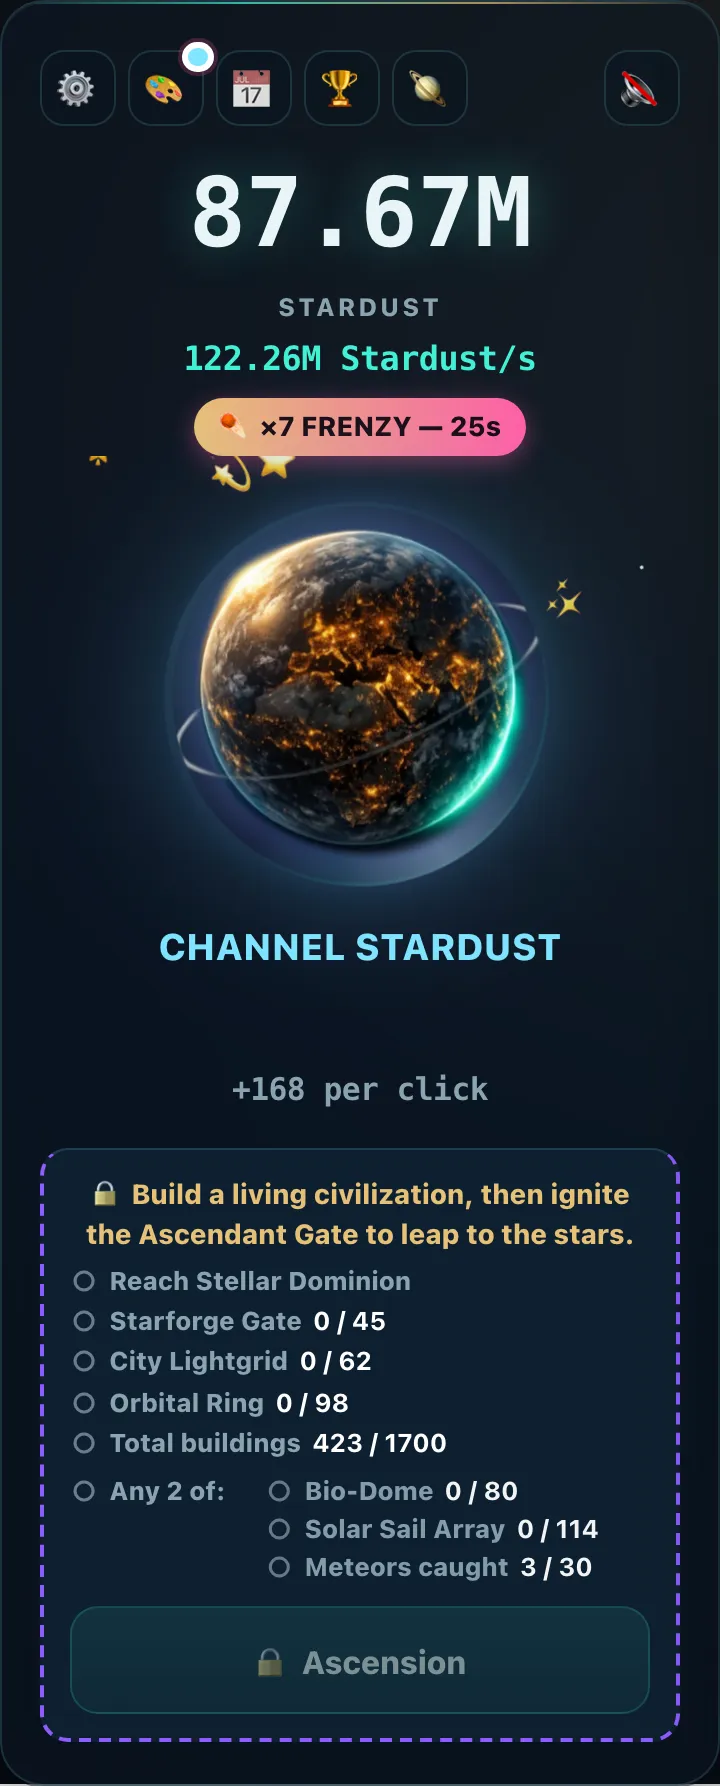
A Supernova is the single largest swing in the game, and there is a way to play it. Your click power is boosted during the frenzy too, so channel furiously the whole time. And because the ×7 multiplies your current output, a Supernova is worth far more when your per-second is already high — if you can, trigger it after you have stacked buildings, not before.
Watching your world evolve
As your total Stardust grows, the planet does not just wear a bigger number — it transforms. Earth moves through nine visible stages, and each one is a little story.

- Barren Core — a dead rock in the dark, nothing but cold stone and the first faint charge of Stardust.
- Molten World — the crust cracks open and rivers of magma become the planet's first heartbeat.
- Ocean World — steam falls as rain for an age until blue oceans close over the rock.
- Living World — green creeps across the continents; the first true breath of air.
- First Cities — lights cluster along the coastlines as the first cities take hold.
- Civilization — a whole world humming, a species that looks up at the stars.
- Orbital Age — rings of stations lace the sky; the planet steps off its own surface.
- Stellar Dominion — solar sails and star-fleets claim the nearby void; one world becomes a stellar power.
- Ascendant Gate — the star-gate ignites at last, and Earth's story opens onto the galaxy.
You do not press anything special to advance — a stage is just a production milestone, so keep building and the world grows into each one on its own. If you want to see all nine as live, rotating globes (plus a look at Mars), the world atlas lays them out end to end.
The locked ladder
Not every structure is available from the start. Cheap early buildings simply unlock by cost — once you can nearly afford one, it appears. But your later, more powerful structures are gated by progress, not just money, and that is on purpose: it mirrors how a world actually comes to life, so you build it in a natural order instead of sprinting straight to the end.
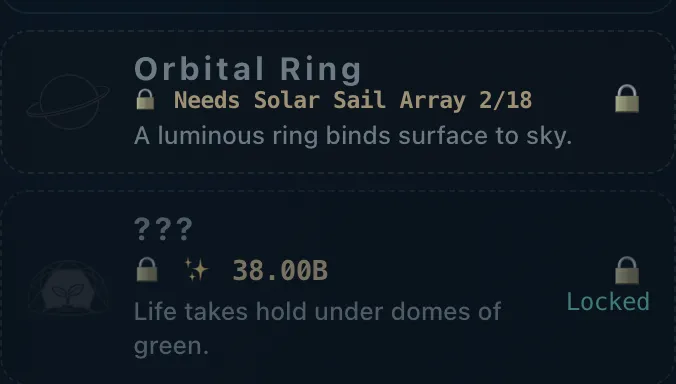
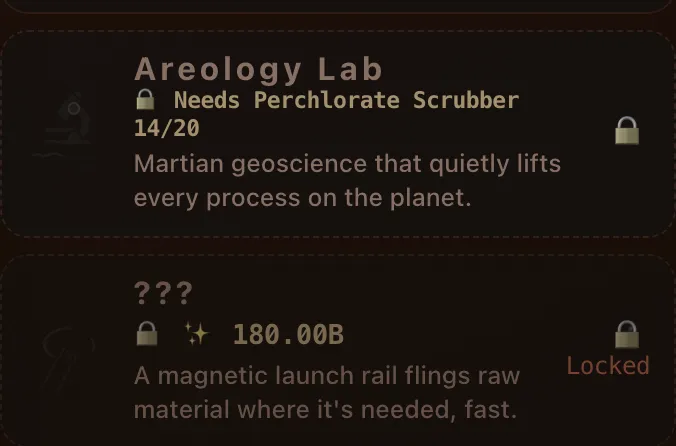
A locked building shows a 🔒 row with its requirement and live counts. In the shot above, the Orbital Ring needs eighteen Solar Sail Arrays and you have two; the mysterious “???” below hints at what is coming next. The whole locked ladder sits at the bottom of the Buildings list, so you always know your next goal and how far off it is. If a building you want is stuck at zero, it is never a dead end — read its 🔒 row and build up whatever it names. For the full unlock table and the design notes for every structure, see the buildings page.
Finishing Chapter 1
A chapter does not end when you hit one giant number. It ends when you complete a checklist and then win a final challenge. The Ascension panel under your planet tracks the checklist live.
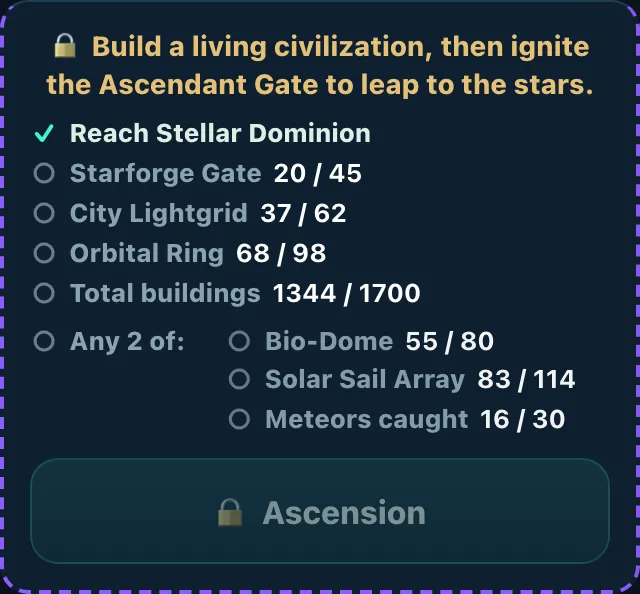
To finish Chapter 1 you reach the final Earth stage (Stellar Dominion), build up your key late structures — Starforge Gates, City Lightgrids, Orbital Rings — clear a total-buildings goal, and satisfy an “any 2 of” clause (Bio-Domes, Solar Sail Arrays, or meteors caught). Tick every box and the final challenge arms: the Ascendant Burn.
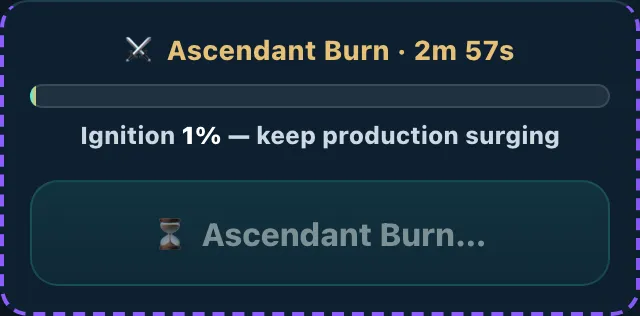
The Ascendant Burn is a timed ignition. You get a temporary production boost and a few minutes to push your Stardust output hard enough to fill the ignition bar before the burn fades — and your click power counts toward it, so keep channeling. It scales to your own output, which means any active player can win it; the only way to fail is to go idle. And if you do fall short, nothing is lost — retrying is free and immediate. Win it and your world flips to its final, reborn form.
Ascension
Winning the final challenge opens Ascension — the leap to the next chapter.
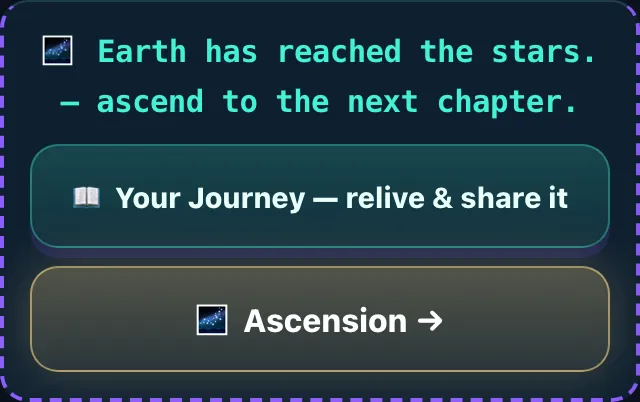
Before you go, the panel offers your Journey — a shareable album of the world you just grew, from dead rock to star-gate, that you can relive and send to a friend. Ascending then carries your story into a brand-new world with its own art, structures and challenge. There is no shard currency to manage and no endless prestige loop to grind: you finish a world and move on to the next.
Chapter 2: Mars
Chapter 2 takes you to Mars — a harder, premium world that adds a mechanic Earth never had.
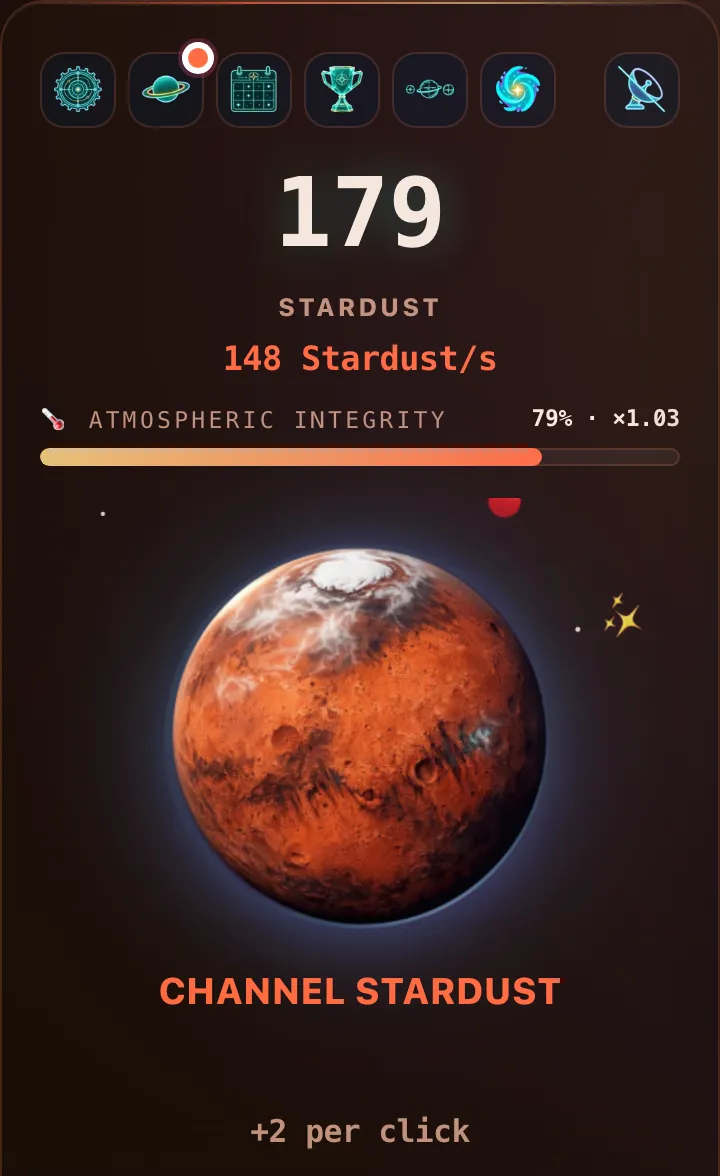
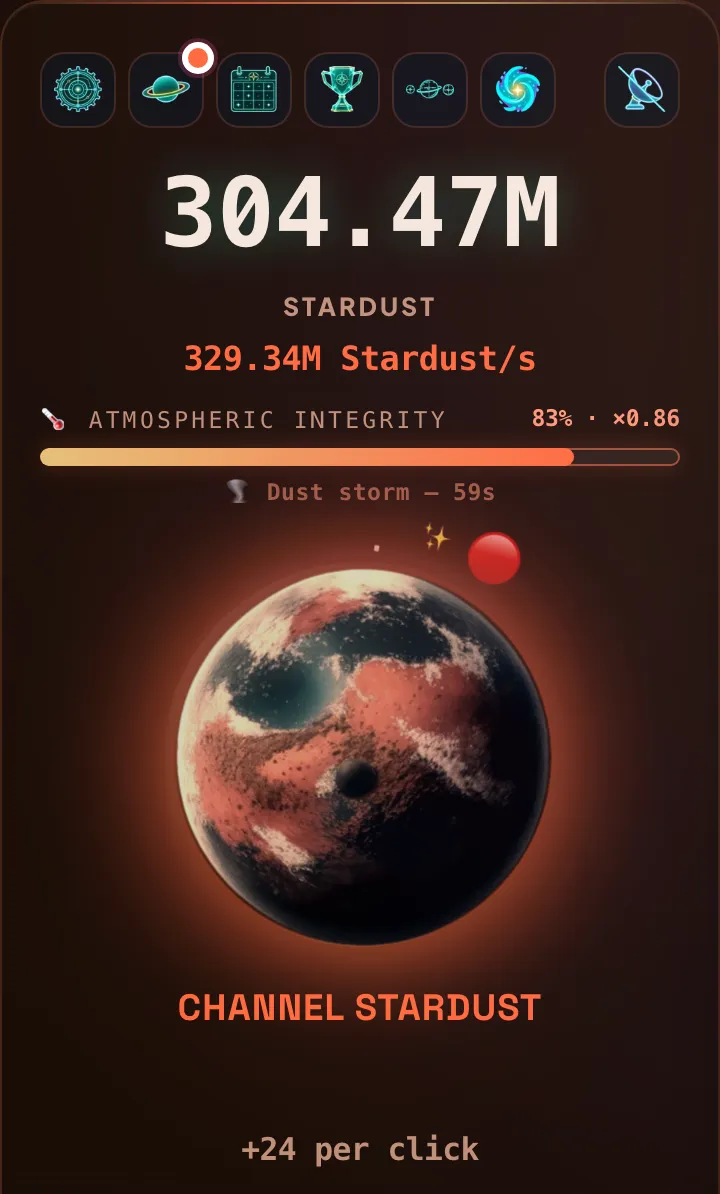
That new mechanic is Atmospheric Integrity: a climate meter, shown as a percentage with a production multiplier beside it, that your buildings slowly raise and periodic dust storms drain.

That tension shapes how you build. Your Martian structures fall into roles: some are mitigators that blunt how hard a storm hits, some are recovery engines that heal your integrity faster afterward, and at least one actually thrives in a storm, turning the weather into an advantage. A storm is a timed event with the multiplier on the line. You are never caught fully unprepared, either: the climate badge counts down the final ~25 seconds before a storm lands, and the thin air visibly dusts up as one approaches.
Just like Earth, Mars gates its bigger structures behind a locked ladder.
Mars ends with its own final challenge, the Eden Storm: one last super-storm you must weather while holding your atmosphere together long enough to bring the red world to life. We are keeping what that looks like for you to earn — but the preparation is everything. Go in with your mitigators and recovery structures stacked and the storm becomes a victory lap instead of a wipe.
Cosmos Memory and the Seed Vault
Finishing a chapter is not the end of your progress — it feeds a second, quieter game that sits above every chapter. Cosmos Memory 🌌 is a small, slow-growing currency that survives Ascension and carries forward no matter which world you are playing, forever. It never resets and never converts back into Stardust — think of it as your account's own memory of everything it has ever grown.
You earn it a few honest ways. Finishing a chapter for the first time pays the most: 10 🌌 for Earth, 15 🌌 for Mars, and more for chapters still to come. Replaying a finished chapter pays too, just less each time — the first replay is worth 5 🌌, stepping down by one on every further replay to a floor of 2 🌌, so replays stay a bonus rather than a way to print currency. Achievements chip in +1 🌌 the first time you unlock one, +2 🌌 for a few flagship ones. And the Seed Vault, below, turns real elapsed time into its own steady trickle.
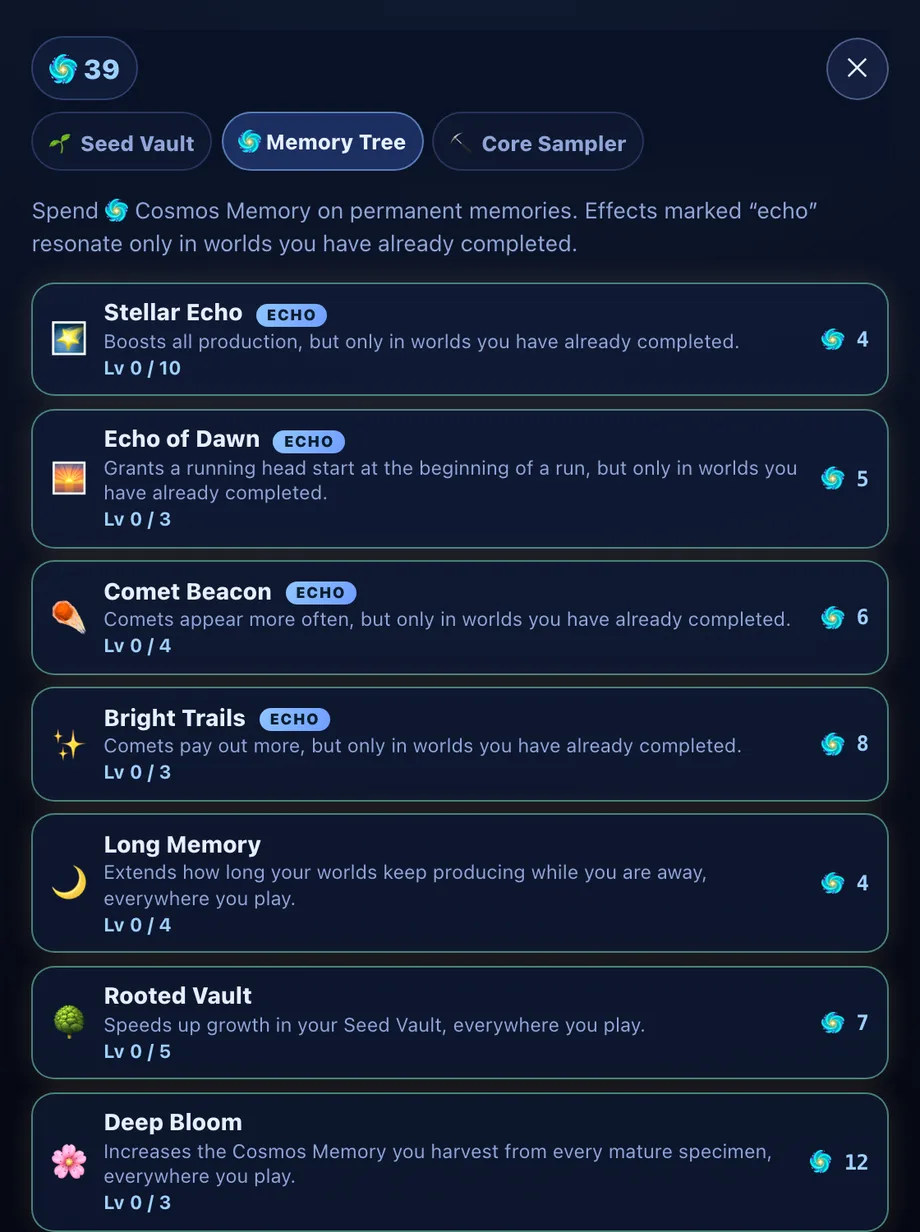
Everything Cosmos Memory touches lives behind the 🌌 button in the menu bar, which opens a three-tab surface: the Seed Vault (grow and archive specimens), the Memory Tree (spend your Cosmos Memory), and the Core Sampler (a dig mini-game that unlocks a little later). The star chart — the Observatory — used to sit here too; it now lives in the 🪐 Worlds menu, next to the chapters it charts.
Spend Cosmos Memory in the Memory Tree, whose nodes split into two families. Echo nodes — Stellar Echo, Echo of Dawn, Comet Beacon, Bright Trails — boost the things that actually move your economy: production, comet frequency, comet payouts, a head start at the beginning of a run. But an echo node only resonates in a world you have already completed: a chapter's first playthrough is always the pure, hand-tuned curve everyone plays, and Cosmos Memory only sweetens the replays afterward. Everywhere nodes — Long Memory, Rooted Vault, Deep Bloom — are smaller quality-of-life perks that help no matter what you are doing: a longer offline cap, faster Vault growth, a little more Cosmos Memory per harvest.
The Seed Vault is where most of that Cosmos Memory comes from — less a garden than a cryo-archive of orbital life, a grid of glass plots where you germinate a specimen, let it grow on real wall-clock time (tab open or closed, no difference), then archive it for its reward. It opens once your world reaches its third stage, or immediately if you have already finished any chapter, so a player standing on the story wall after Ascension always has something to tend. You start with four plots and three starter species — Lichen, Moss and Fern — each trading grow time against Cosmos Memory. Archiving also rolls a cross-breed: if the specimen next door is mature too, the pair is checked against a hidden recipe, and there is a real chance a new species is discovered on the spot. Harvest a mature Lichen beside a mature Fern and you have a genuine shot at unlocking Glowcap, a hardier hybrid neither parent could grow alone; undiscovered species otherwise sit in the planting drawer as “? ? ?” with a hint at the pair that might unlock them. Two practical tips: the plots must touch up/down/left/right (diagonals don't count), and only the first mature neighbour of the plot you harvest gets checked — so when you're hunting a specific cross, give the pair some room instead of packing the grid with other mature specimens. Mars-native crosses also only roll while you're playing the Mars chapter. Rarer genomes wait several cross-breeds deeper — we're leaving those pairings for you to find.
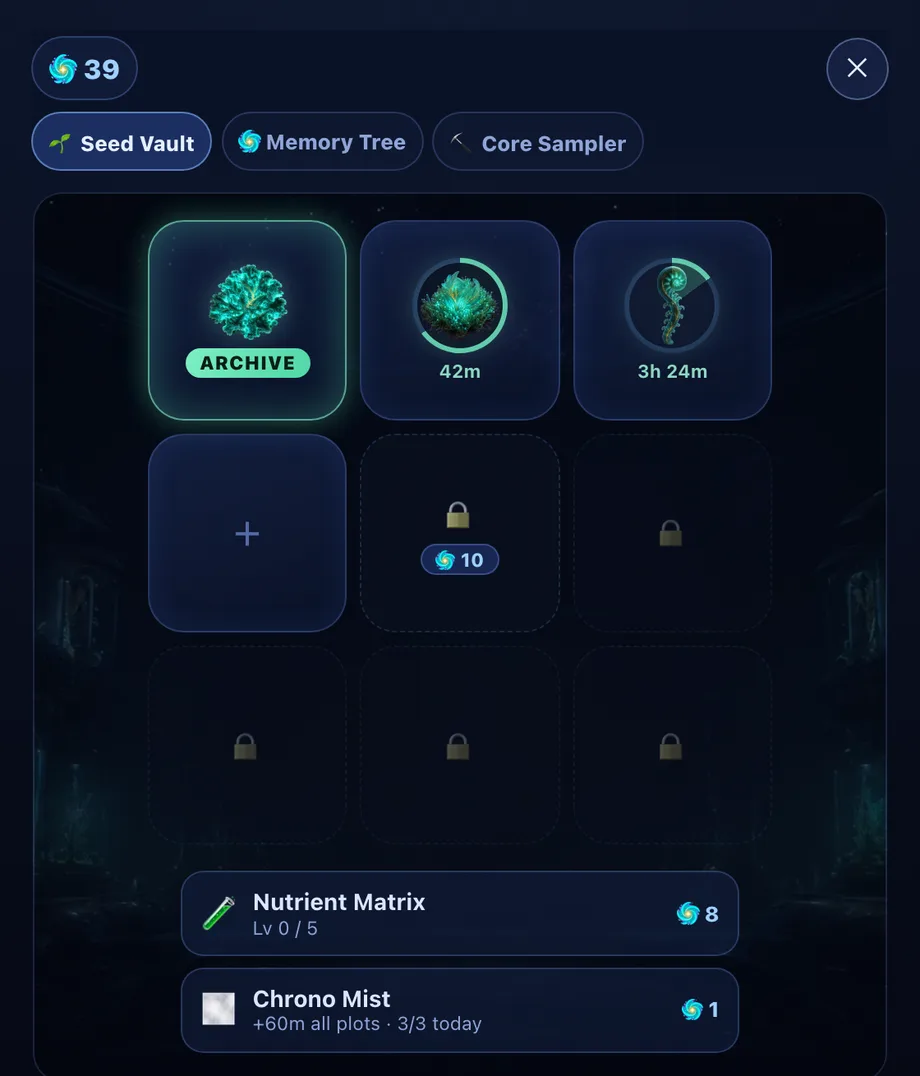
A couple of species skip Cosmos Memory entirely and release a temporary production frenzy instead — the same flavor of boost as a comet's Supernova, just grown rather than caught. Plots beyond the starting four unlock with Cosmos Memory as you go, up to a maximum of nine, and two Vault tools help you tend them: the Nutrient Matrix permanently speeds up growth across every plot, and Chrono Mist spends a little Cosmos Memory to instantly advance every plot's growth by an hour — capped at three charges a day so it stays a convenience, not a shortcut.
Each world can also bring its own native flora — species that only grow under that world's skies. On Mars the planting drawer groups them into a Native to Mars section of their own so they never get lost among the universal specimens, and flags them the first time you open it.
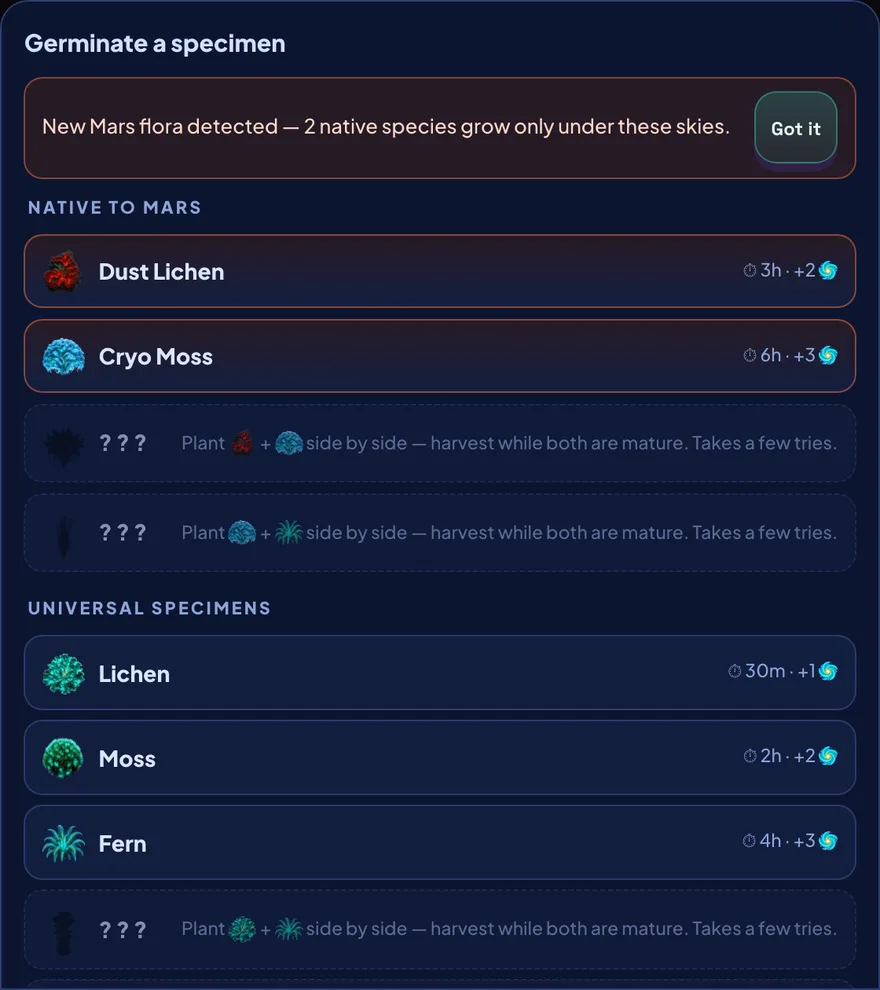
The Core Sampler
The third tab behind the 🌌 button is the Core Sampler — a small dig mini-game that opens a little later than the Seed Vault (it unlocks once your world reaches its fifth stage, or immediately if you have already finished a chapter). It is an optional side-board that turns patience into Cosmos Memory and a few other prizes, not something you need to win a chapter.
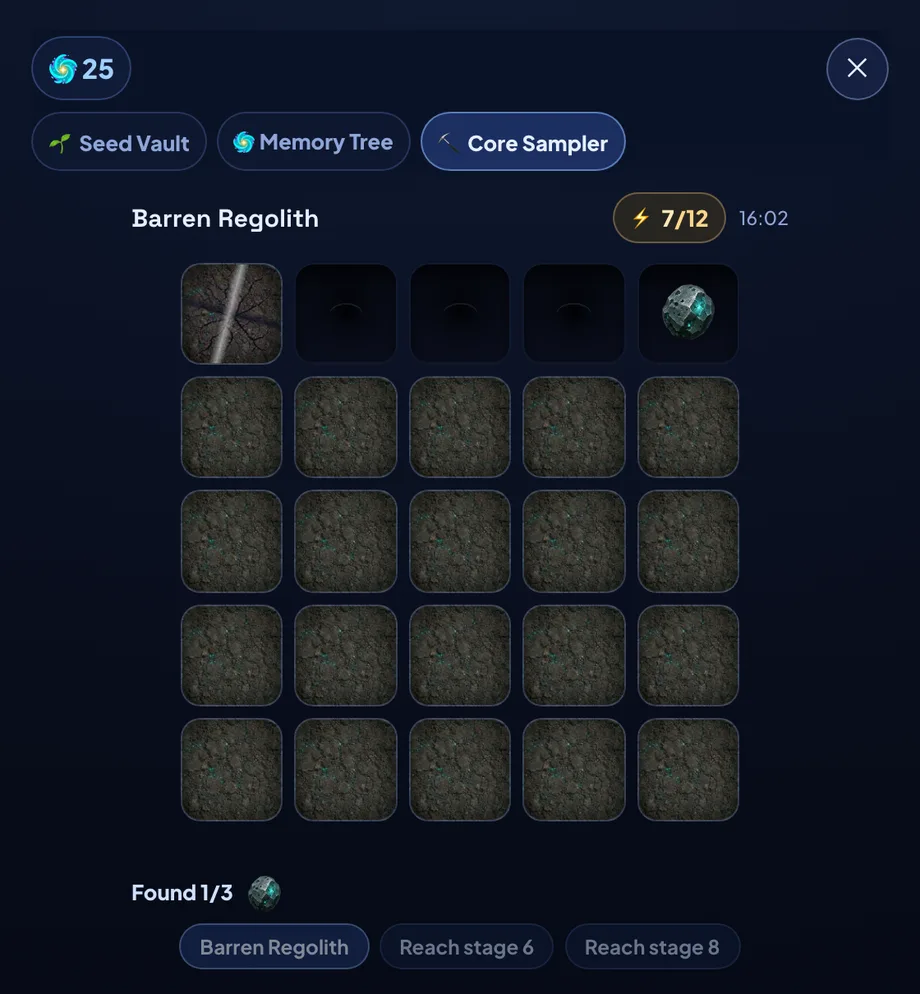
Digging runs on Energy, a slow wall-clock resource. Your bar holds up to 12 charges and refills one charge every 20 minutes, so a full bar from empty takes about four hours — that is what keeps the Sampler a thing you dip into, not grind. Every cell you tap spends one charge, and each cell has a hardness of one to three hits before it breaks through. To help you aim, cells next to buried loot you have already dug near shimmer with a warm-trail hint, so you are never digging completely blind.
Break through to a buried token and it pays out one of four kinds of prize: a production windfall (an instant lump of Stardust scaled to your current rate, like a comet's), a chunk of Cosmos Memory, a short production frenzy, or a relic for your lifetime collection. Find every token buried in a site and it is cleared for a small Cosmos Memory bonus, and a fresh site is surveyed in its place. Deeper strata open as your world advances, each with richer finds.
The Observatory
The last piece of the meta-game is the Observatory — a star chart you fill in simply by playing. It moved out of the 🌌 cosmos surface and now lives in the 🪐 Worlds menu, sitting right below your chapter cards.
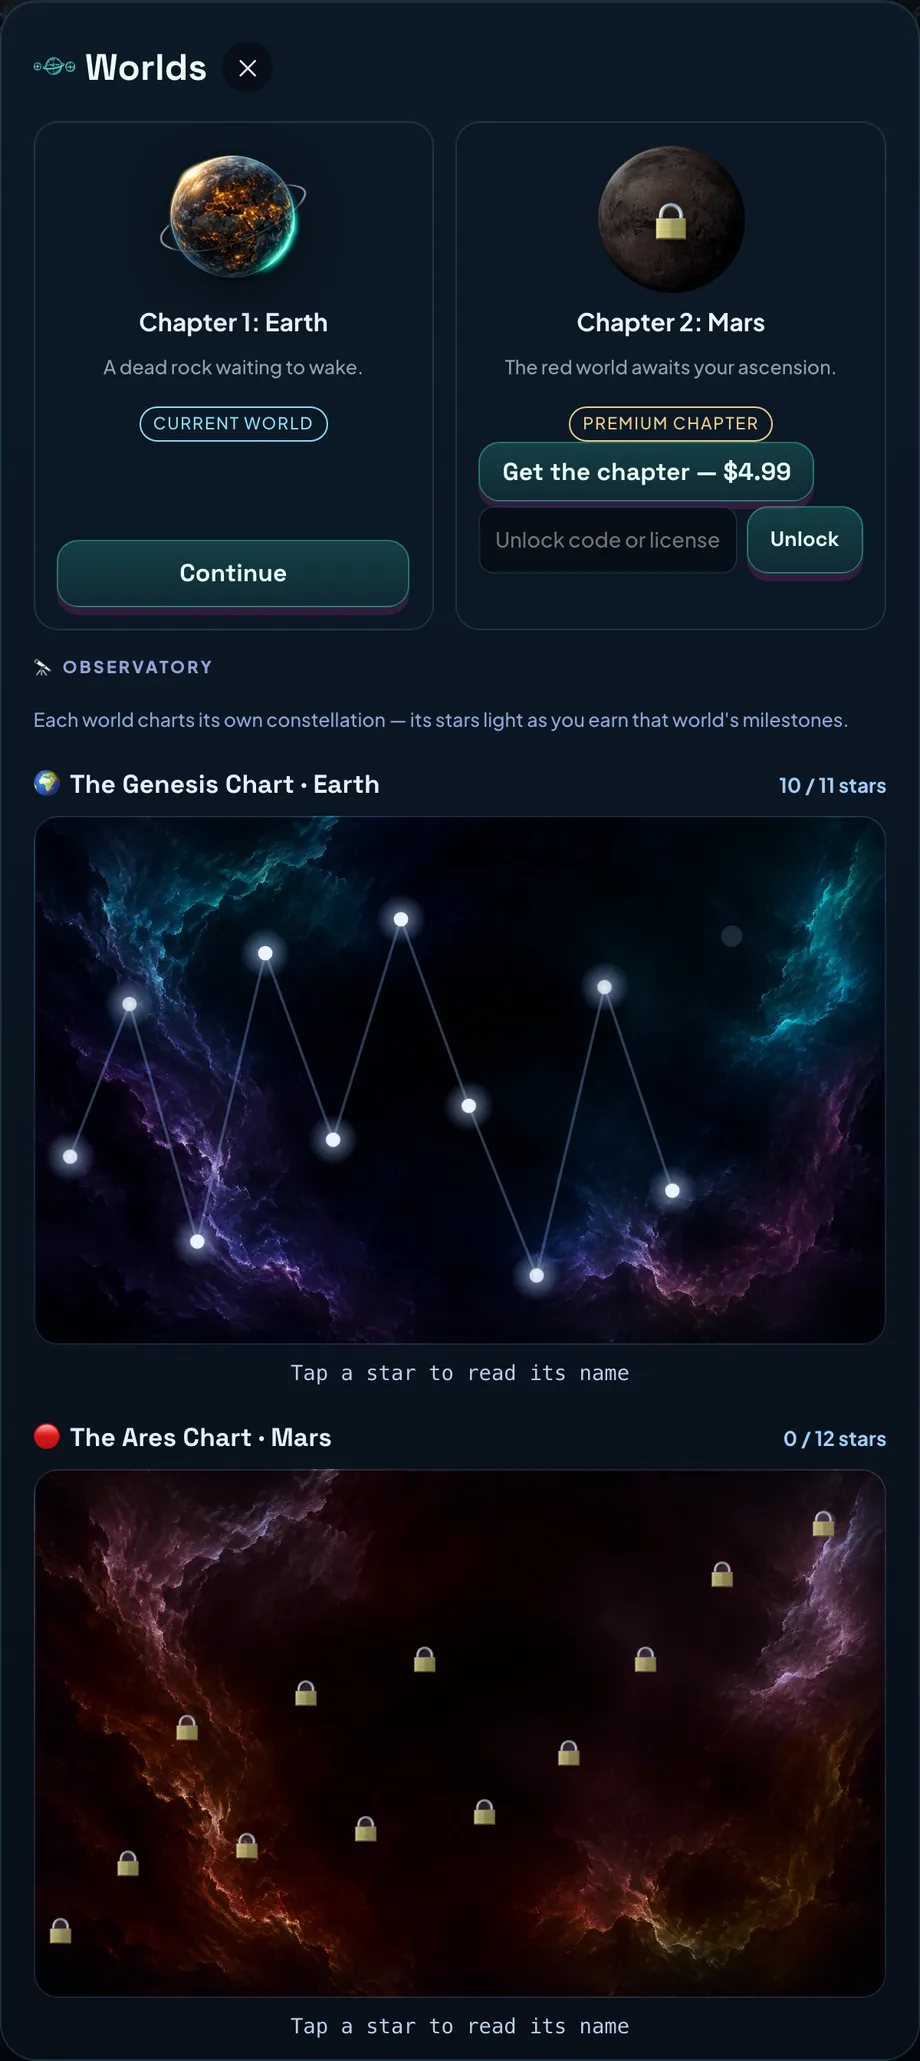
Every star maps to something you have already earned — achievements light most of them, and completing a chapter ignites a brighter one. There is no separate grind: a star simply switches on the moment its achievement or chapter is done, and a short ceremony plays to mark each new one. Tap any star to read its name — First Spark, Blue Marble, the Threshold Star. Fill in The Genesis Chart completely and it pays a one-time reward — 5 Cosmos Memory, a small permanent +2% to all production, and the title “Cartographer of the First Sky.” The two greyed-out stars at the chart's edge are Chapter 2 (Mars) content — they light only once you own and play that world, which is why the chart cannot be completed on Earth alone.
Offline progress and daily goals
Your world keeps orbiting while the tab is closed. PlanetIdle banks up to eight hours of offline production, so a planet earning a healthy per-second rate will greet you with a real pile of Stardust — and sometimes a nudge that you can now afford your next unlock.
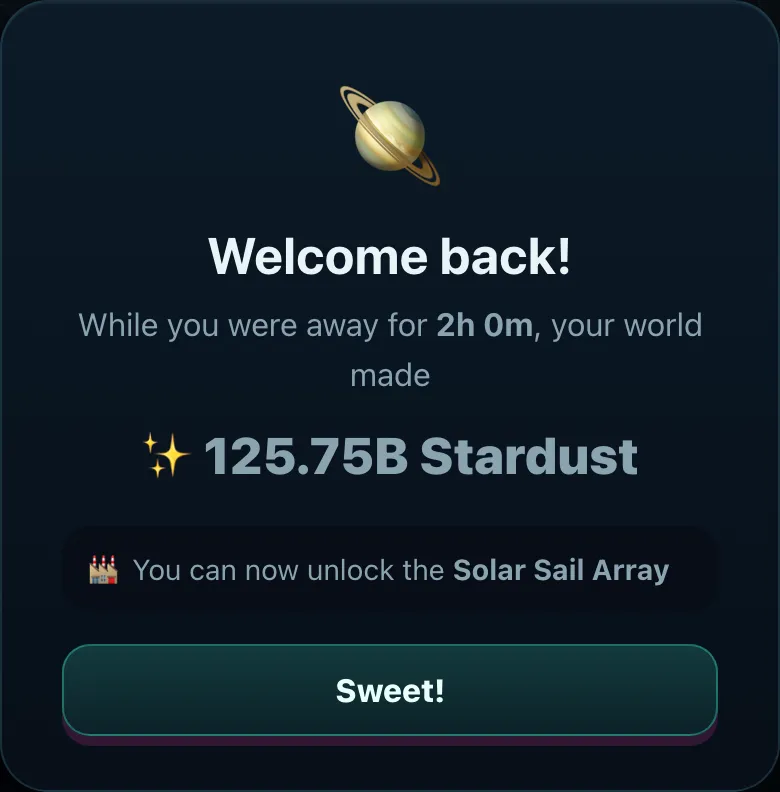
Two habits make offline time pay. Before a long break, spend down into your income: get your Stardust-per-second as high as you can, because that rate is what runs while you are away. And treat each session as a set of small goals — trip one more milestone star, unlock the next locked building, tick one more box on the Ascension checklist. Idle games reward the return visit, and PlanetIdle is built to make each one feel like progress.
Where to go next
That is the whole arc, from your first tap to a reborn world. When you are ready for more: the buildings page has the full unlock table and the craftsman's notes behind every structure; the world atlas shows every world stage as a live globe; the about page explains why we built an idle game with an ending; and the game itself is one click away — go wake a world.